CMS - Photo (Gallery)
1. Add a CMS Photo Section
1. In the left swipe menu go to Content & Design > Content > Sections
2. Click the green button "+ Add a section " from the right column
3. Add a photo section by choosing "Gallery" in the content items.
4. Give it a title > Click "Add"
2. Click the green button "+ Add a section " from the right column
3. Add a photo section by choosing "Gallery" in the content items.
4. Give it a title > Click "Add"
2. Upload Images
1. Click the 3 dots in your sections list, then "Edit the content"

2. Click the green button "Add a photo" in the main column
3. Upload images from your computer to your app section

Maximum dimensions for an image are 3264 * 3264 px.
Size must not be larger than 4 MB.
You can upload up to 100 pictures at the same time, you'll get an error message when you go beyond that.
Size must not be larger than 4 MB.
You can upload up to 100 pictures at the same time, you'll get an error message when you go beyond that.
3. Edit Images
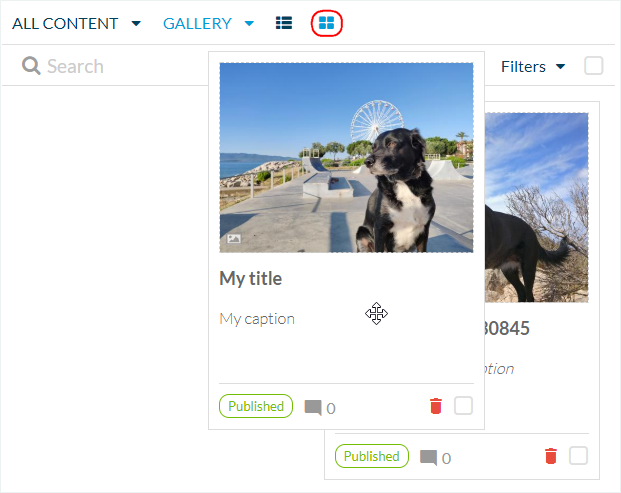
1. Go to the menu Content & Design > Content list
2. Select "All photos" in the drop down menu
3. Select the section involved if needed from the drop down menu
4. Modify the title of the photo by clicking it
5. Add a caption by clicking it
6. Modify the publication status of the photo
7. Delete images by clicking the red trash icon
8. Check the number of comments and manage them by clicking the icon Comment

Note:
- Select list or grid view from the top bar
- Use filters if needed, it will sort your photos by status

9. Crop the image and/or apply effects
- mouse over the thumbnail image
- click the blue icon

4. Order your Images
1. Select the Grid view
2. Drag and drop images to order them
5. Settings of your Photo Section
1. Go to the menu Content & design > Content > Sections
2. Click the 3 dots next to your section
3. Click Settings:
- edit the title of your section
- activate comments
- customize the URL of the section
- etc..
For more details about the settings menu of a section, please read this online help.
3. Click Settings:
- edit the title of your section
- activate comments
- customize the URL of the section
- etc..
For more details about the settings menu of a section, please read this online help.
Related Articles
Content Management System (CMS) Section
1. Add CMS Section CMS sections allow you to create and manage your content directly from the back office. Add a new CMS section : 1. In the left swipe menu go to Content & Design > Content > Sections 2. Click the green button "Add a section" from ...CMS - Video (Web Tv)
1. Add a CMS video section1. In the left swipe menu go to Content & Design > Content > Sections 2. Click the green button "+ Add a section " from the right column 3. Add a video section by choosing "WebTv" in the content items. 4. Give it a ...CMS - Podcast / Sound Sections
This CMS section allows you to upload your sound files directly into your backend Muse mBaaS to display them in a sound section. 1. Add a New Podcast Section 1. In the left swipe menu go to Content & Design > Content > Sections 2. Click the green ...Blog - CMS Article Section
Enhance your app with a blog to showcase your products from a different angle, by writing blog posts. The Blog section allows you to showcase your products and organize a story around your shop. You can then keep in touch with your clients and ...Links and Embeds in CMS Sections
1. Create an External Link To create an external link to an external source in a text paragraph: 1. Select the text you want to make clickable 2. Click on the link icon in the toolbar of the paragraph 3. Select "External Link" as a type 4. Paste the ...