Create a Map via a KML File with Google Maps
1. Creation of a Map
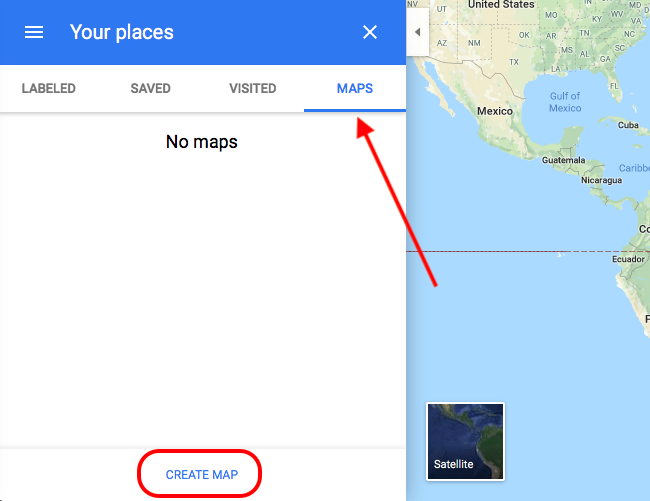
To begin the creation of your map, open Google Map in your browser: https://www.google.fr/maps/In the menu, click on "Your places."

2. Attention
Once you are here, you have access to all the features allowing you to create your map.

3. Export the KML File of the Map
Once your points are created, you can now export your KML file. Click on the icon near the title and choose "Export to KML/KMZ."

Related Articles
Import a Multipoint KML File
1. Add a KML Map Section The Map section allows you to display and customize geo-targeted points on a map in your Muse mBaaS app. 1. In the left swipe menu, go to Design & Structure > Structure > Sections 2. Click the green button "Add a section" ...Display Lines and Polygon using a kml File
The Map section can display the following geometries : Points Lines Polygons Points can be created using the CMS or can be imported using a KML file. Lines and Polygons are created by uploading a KML file into the map section. 1. KML Structure If ...CMS - Map
1. Add a Map Section 1. In the left swipe menu go to Design & Structure > Structure > Sections 2. Click the green button "Add a section" from the right column 3. Add a map section by choosing "Map" in the content items. 4. Give it a title 5. ...Custom Code in your App Content
Muse mBaaS offers the possibility to use external code within the app. There are a few options that allow you to do this: plugins, APIs, custom feeds, HTML sections/Widgets, etc. 1. Add a Plugin Section An HTML5 plugin for Muse mBaaS is a bundle of ...Content Management System (CMS) Sections
1. Add CMS sections CMS sections allow you to create and manage your content directly from the back office. Add a new CMS section : 1. In the left swipe menu, go to Design & Structure > Structure > Sections 2. Click the green button "Add a section" ...
