Display of the Different Payment Method in the Checkout Process
The purpose of this online help is to explain the payment methods displaying on the Shopping Cart and Order (checkout) pages.
The cart lists the products selected for your purchase. The next step is the checkout (payment of the order) to determine the final price, that is to say the price including any eventual shipping fees and / or the management of any eventual taxes.
To determine the final price, the customer must:
- enter their full address
- choose the delivery method
Once these two pieces of information are provided, the full price of the order can be calculated and the customer can proceed to the payment step.
1. Payment System Display in the Checkout
If you have activated several payment methods, they will all be displayed one below the other, so the customer can choose the one that suits him best.
Depending on your location, you will have access to the different gateways and payment methods (Stripe, Paypal, Mercado Pago and Offline payment).
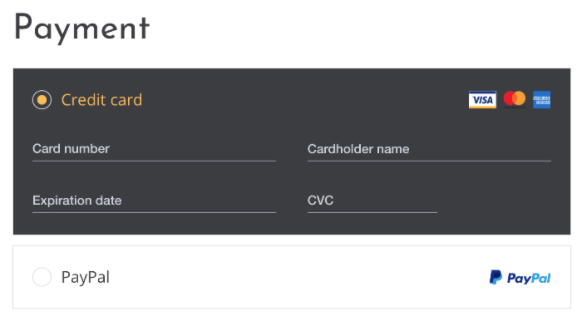
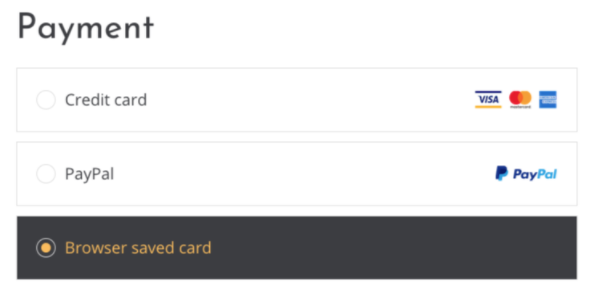
2. Credit Card Saved on the Browser
If you set Stripe for your app, your client can use the card they have registered into their browser.
Once they've typed in their CVC, other details will be automatically filled in (card number, expiry date and CVC)


Note:
- This is not available on Apple environment
- If a user didn't save his card in his browser, he will have to fill in all details of his bank card manually.
- This is not available on Apple environment
- If a user didn't save his card in his browser, he will have to fill in all details of his bank card manually.
3. Credit Card Saved in your Shop
If you've set up Stripe, and that your customers create their "Client account" on your app, then they can save their credit card so they don't have to re-enter all details on a next purchase.
Therefore they will be able to pay quicker on the next purchase, if they are authenticated beforehand, of course.
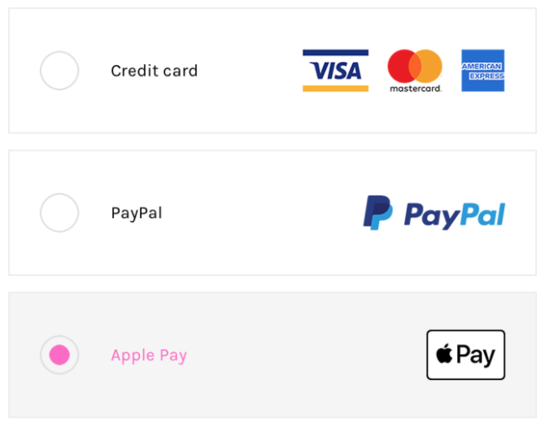
4. Apple Pay
If you have set Stripe, your customers can use Apple Pay, if they have enabled this payment method in their Apple environment.
They must register a credit card on Wallet beforehand.
In this case, ApplePay can be used:
- from an Apple device (iPhone, iPad)
- from an Apple computer with Touch ID
5. Buy from the Cart Directly
1-click payment is available from the cart, without going through the Checkout process under certain conditions.
It is indeed possible to pay directly without re-entering your address and the details of your credit card via Apple Pay or the Saved cards.
These 1-click payments are only available if the user has all the information about his order (amount including all taxes) and that an account creation is not requested.
The exceptions to using Apple Pay / 1-click payment are:
- If your store requires an authentication to order. Account registration is not allowed during a 1-click transaction.
- If you make any of the following fields mandatory: Company, VAT, Phone or Client's note
- If your shop is not including taxes by default, because the price displayed in the cart does not correspond to the price that your client will pay (taxes included).
Related Articles
Credit Card Saved on Browser (Payment Request API)
The Payment Request API or Credit card saved on browser is a solution that uses a credit card registered in an Internet browser. 1. Activation of the Payment Request API In order to activate this payment method, you first need to set Stripe in your ...Set up the Order Process
The creation of an account for the order process can be optional or required. To set this up: 1. Click "Checkout Process " in the menu Settings > Order Process 2. Select the option desired: - "Account optional" : Your clients can order with a client ...Introduction to Payment Gateway
With Muse mBaaS, you can quickly and easily activate two payment gateways to allow your clients to safely purchase in your shop: 1. Fill in the shop informations. Refer to this online help for more details. 2. Go to the menu Settings > Payment ...Offline Payment
With the Offline Payment extension, your customers can pay for an order outside of the app. For instance, this extension is very useful if you want clients to pay cash on delivery. 1. New Payment Option for CustomersDuring checkout, customers can ...New Order Process
When a customer buys a product on your shopping app, it creates an order in the "Orders " section of your back office. 1. What Happens When an Order is Placed on your Shop? When one of your customers places an order: - You automatically receive an ...