The Live + Extension (Paid Option)
1. Activate the Live+ extension
Live + is a paid extension that you can activate in your Muse mBaaS project for an extra fee.
The extension must be purchased for each new Live + section you want to add to your app, meaning that each purchase of the Live + extension will add an extra Live + section to your app (= to add 2 Live + sections to your app, you need to purchase the extension twice, to add 3 Live + sections to your app, you need to purchase the extension 3 times, etc.).
You can try the Live + extension for free before you purchase it.
The free trial period of this add-on is 15 days.
To start your trial:
1. Go to the left swipe menu Extensions Store > All Extensions > Live +
2. Click "Test the option for free"
Please note that if you decide to end the trial and purchase the add-on before the 15 days are over, the trial won't be renewed.

2. Set your Live + streaming feed
The Live + section is a direct audio stream that displays additional information during audio playback.
Mandatory requirements:
A - The audio stream must be served over https
B - You must set access to your server in order to retrieve the metadata:

Set a header Access-Control-Allow-Origin to *
Set a header Access-Control-Allow-Headers to Icy-MetaData
Set a header Access-Control-Expose-Headers to icy-meta into
Metadata properly set in your feed will allow Muse mBaaS to ask iTunes for the track’s title, the artist's name, the cover image, and a link to purchase the track. Available information will then be displayed in your app.
3. Set your Live + section
After purchasing or activating the trial for the Live + add-on:
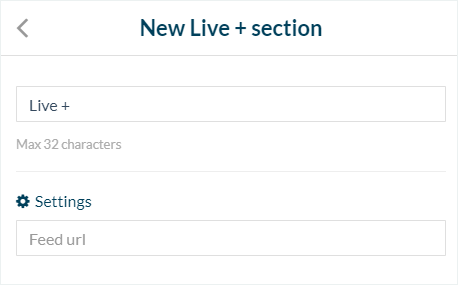
1. In Design & Structure > Structure > Sections, select your Live + section
2. Add a title for your section
3. Fill in your feed URL*
4. Click "Add"

4. Schedule your stream
This is optional.
1. Turn on the "Schedule "on the air" time slot" option
2. Set the time for your section to go on air.
3. Turn on "Repeats" and use the drop-down menu to select a period.

5. Warning!
The Live+ page's meta-data is intended to be used for songs.
If your stream includes Talk Radio or Talk content the meta-data for this type of content may not generate correctly.
If your stream includes Talk Radio or Talk content the meta-data for this type of content may not generate correctly.
Related Articles
Live Video
1. Activating the Live Video Extension The Live Video section is designed specifically to stream video. To create a Live video section, activate the Live video add-on in the menu Extensions Store > All Extensions and scroll down to Live Video. ...Custom Code in your App Content
Muse mBaaS offers the possibility to use external code within the app. There are a few options that allow you to do this: plugins, APIs, custom feeds, HTML sections/Widgets, etc. 1. Add a Plugin Section An HTML5 plugin for Muse mBaaS is a bundle of ...The Live Section
1. Settings The Live Audio section is designed specifically to stream audio. Activate the Live Audio extension in the left menu Extensions Store > All Extensions Scroll down to Live Audio. Click on the green "Install" button. To learn how to add ...Articles - External Content Sources Available
1. Connect your External Sources to your Muse mBaaS Application 1. Go to the left-hand menu Design & Structure > Structure > Sections 2. Click + Add a section button 3. From the list of all Sections click "Load more" to display all types of ...Content Management System (CMS) Sections
1. Add CMS sections CMS sections allow you to create and manage your content directly from the back office. Add a new CMS section : 1. In the left swipe menu, go to Design & Structure > Structure > Sections 2. Click the green button "Add a section" ...